Booting from USB flash drive is possible with virtualization apps like VirtualBox and Virtual Machine Manager. This article will demonstrate multiple methods to boot your USB flash drive in a VM.
VirtualBox Instructions
- If you don’t have VirtualBox installed, you can download it from the official website.
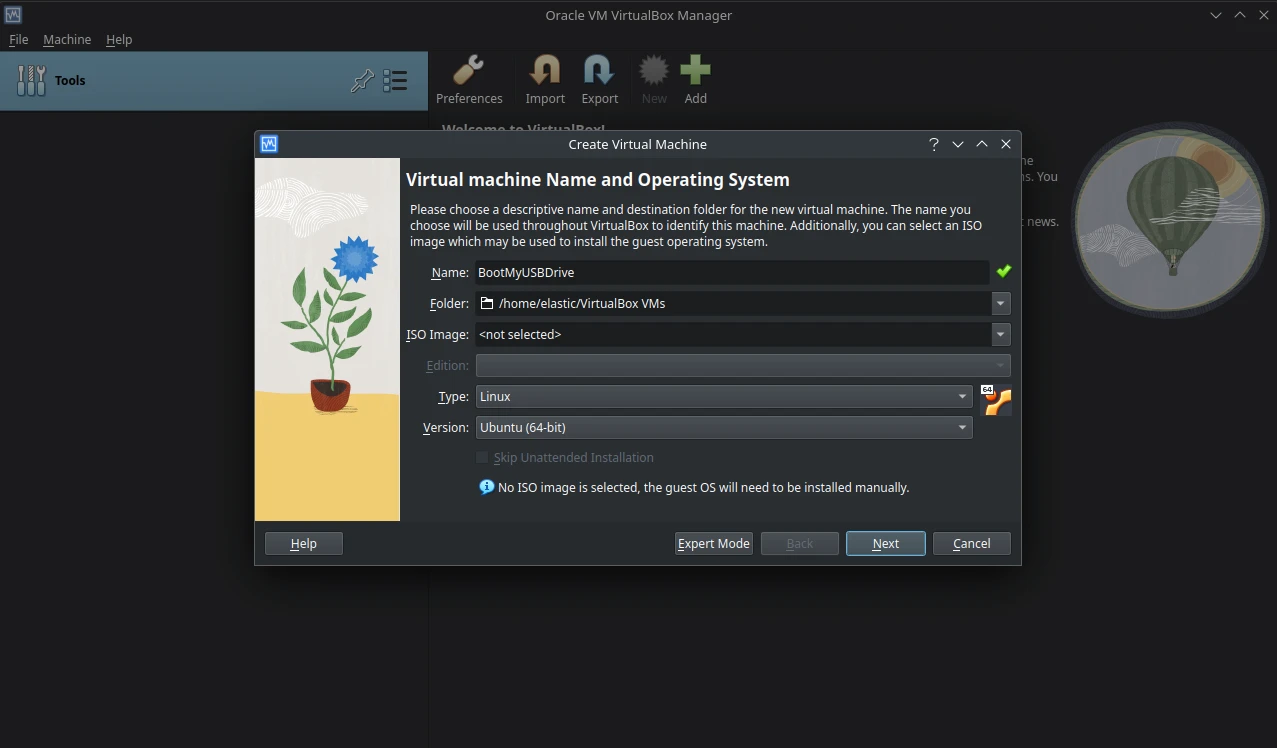
- Click
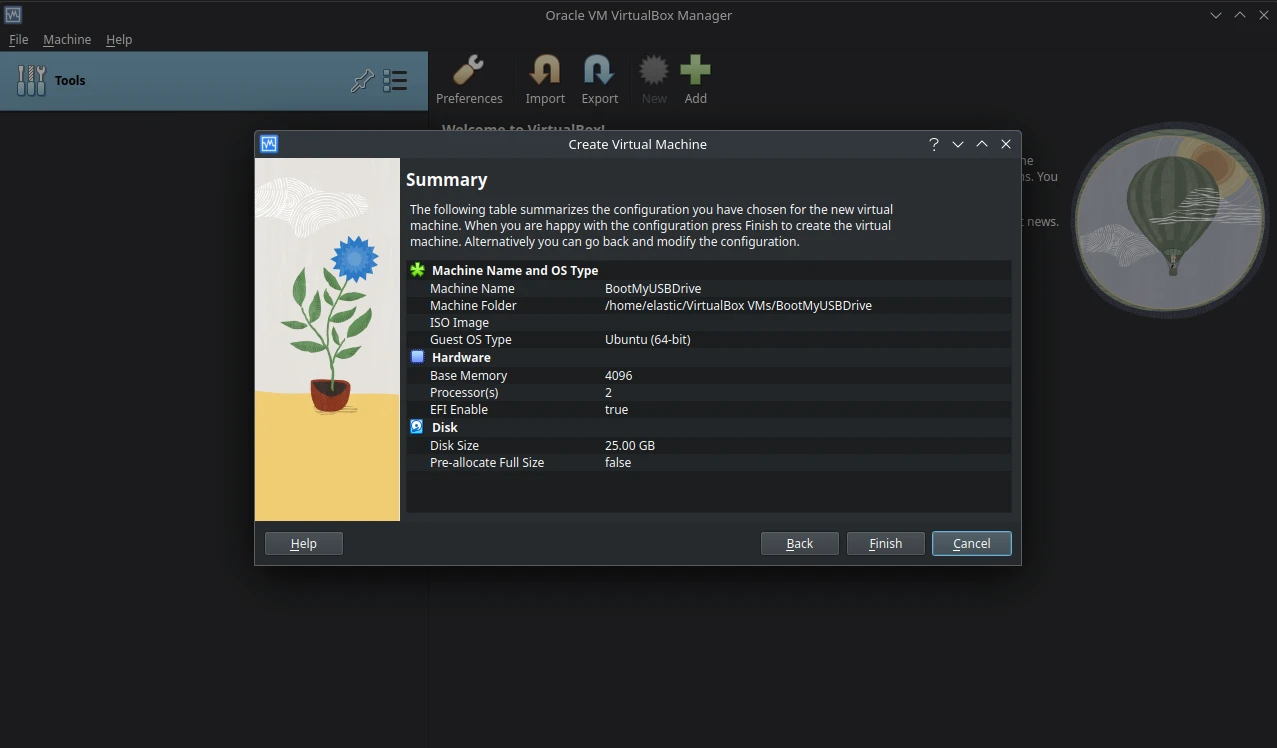
Newto create a new virtual machine in VirtualBox. Select the OS you need to install from the flash drive.
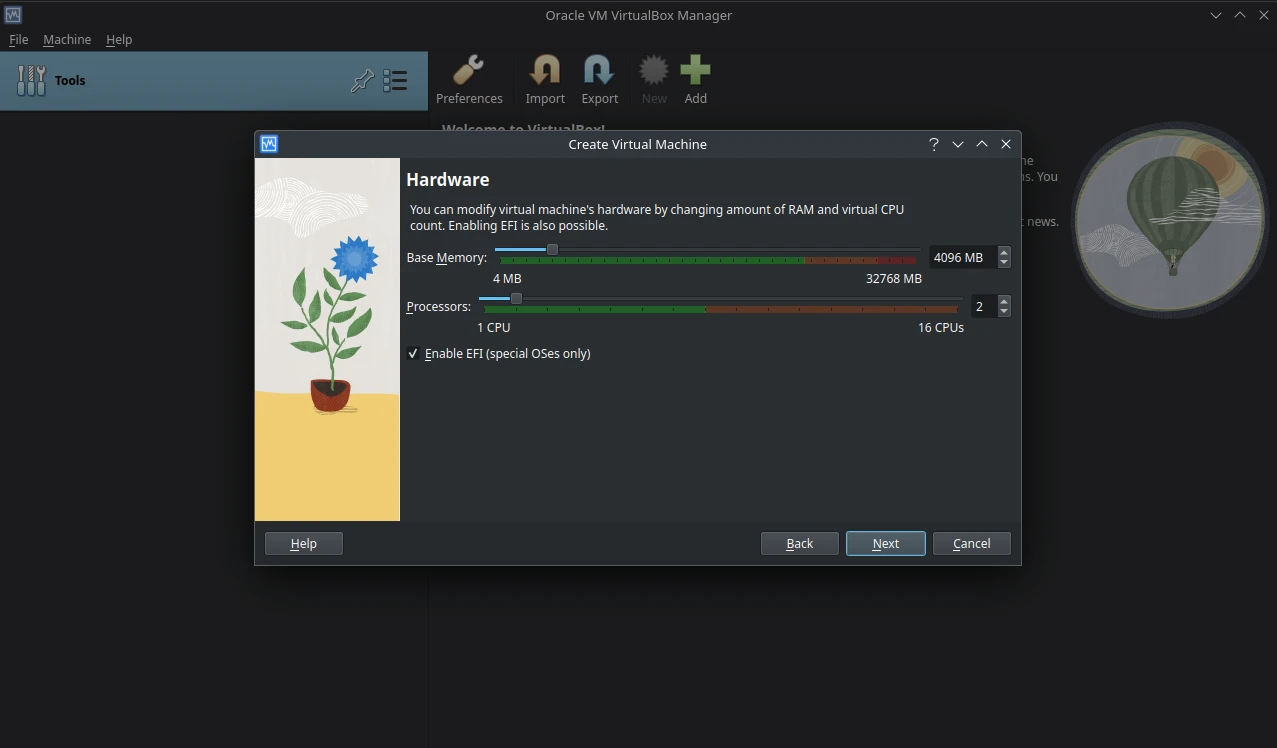
- Assign desired CPU and RAM for the OS you are installing from the USB drive.
- Enable EFI if the flash drive has UEFI boot support.
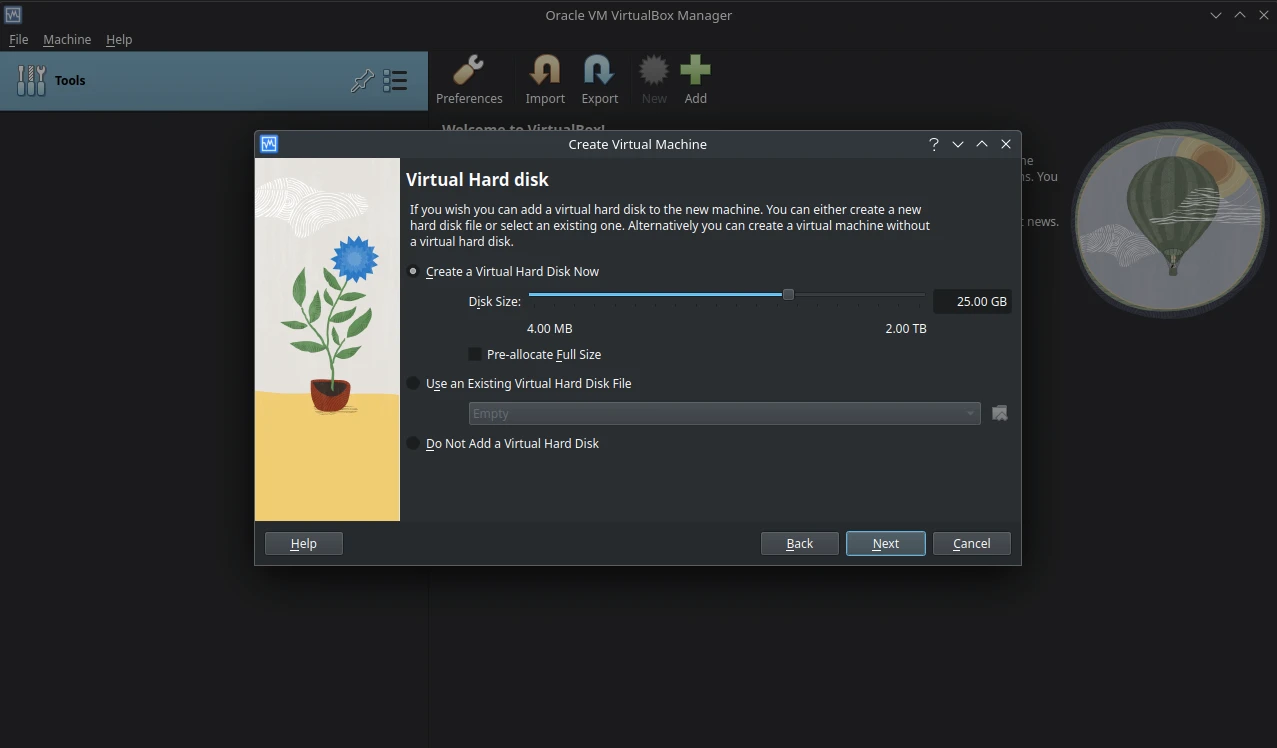
- Assign desired storage size for your new VM.
- Click
Finishto complete the VM creation.
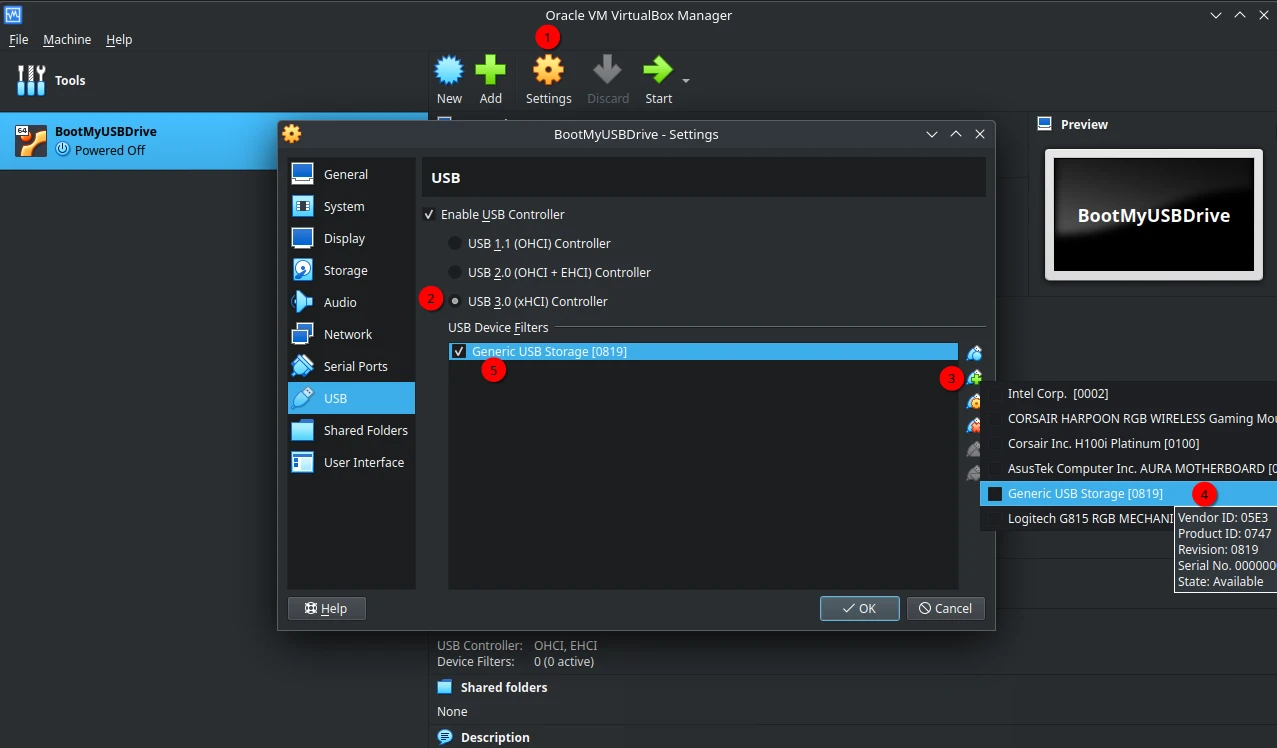
- Select your new VM, and Click
Settings. - Under USB settings, change the USB controller to
USB 3.0. - Click the green
Addbutton to select your flash drive from the list of connected USB devices.- For VirtualBox 7.1 and above, change to
Expertmode to see all settings.
- For VirtualBox 7.1 and above, change to
- Click
OKto Save.
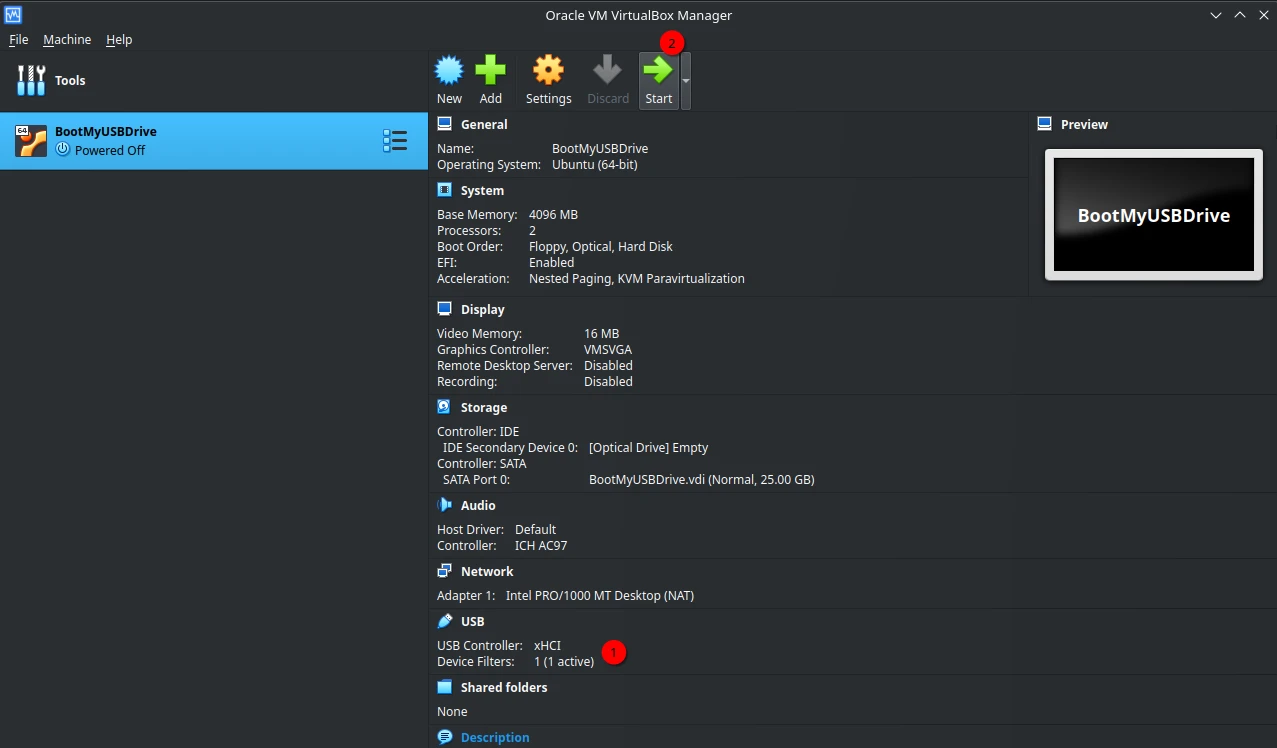
- Confirm USB device filter is correctly set and active, then
Startyour VM.
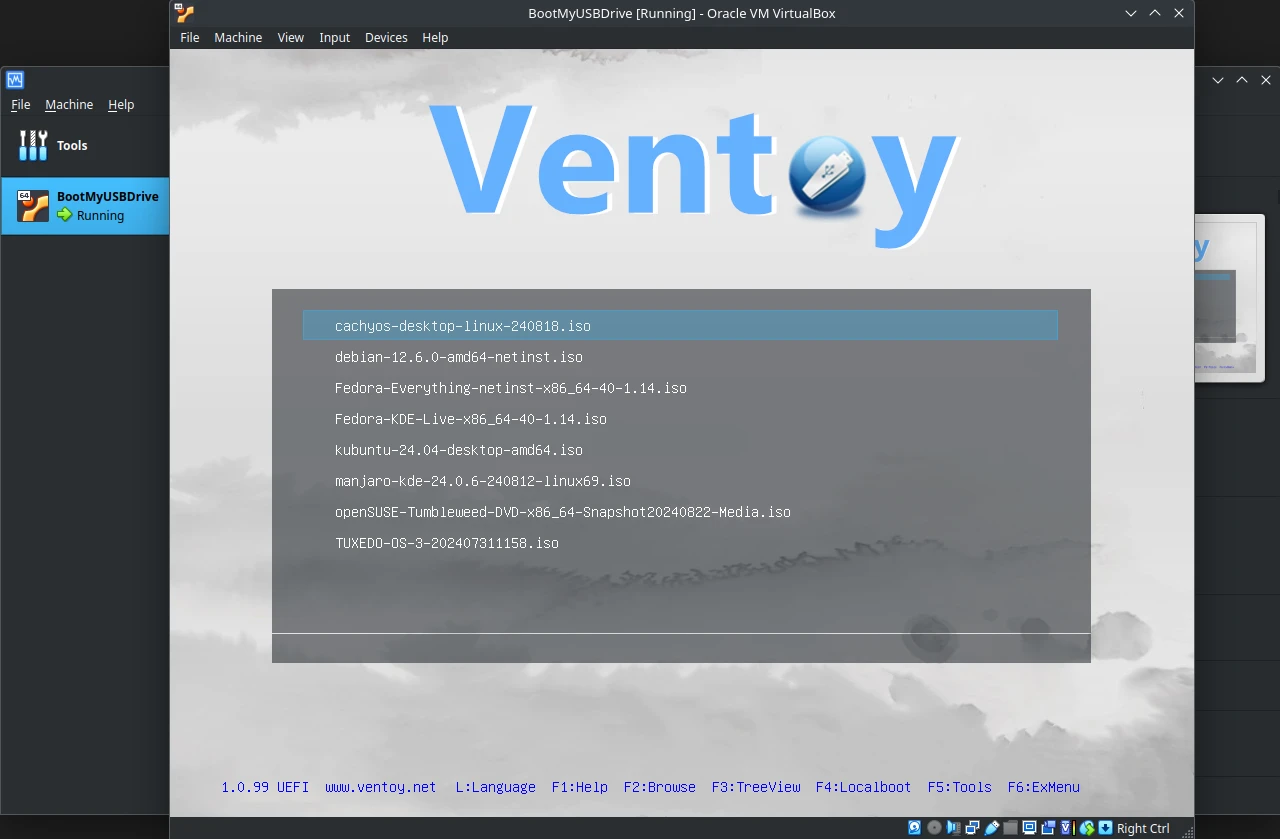
- The USB flash drive should now be booted in your VM.
Virtual Machine Manager Instructions
If you don’t have virt-manager installed, you can download it for your OS.
| |
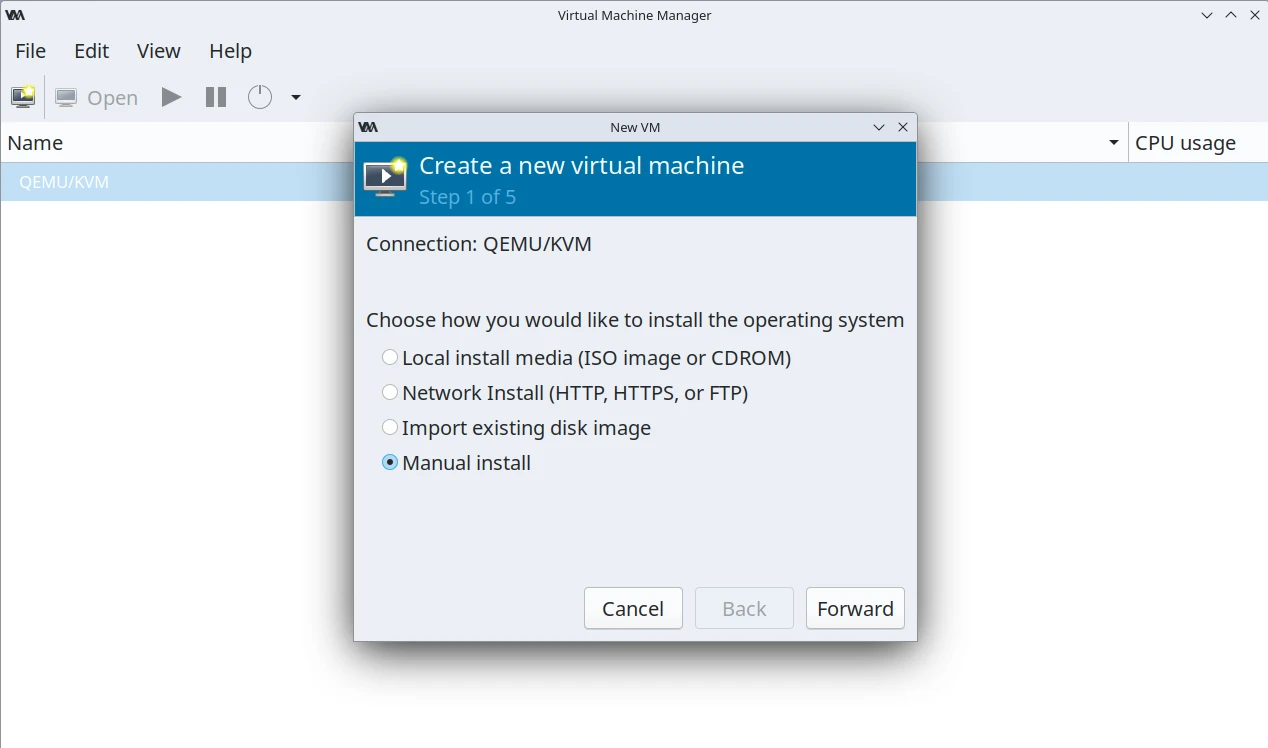
- Start by creating a new virtual machine using
Manual install. - Assign Desired CPU and RAM for the VM to match the OS you are trying to install from the USB flash drive.
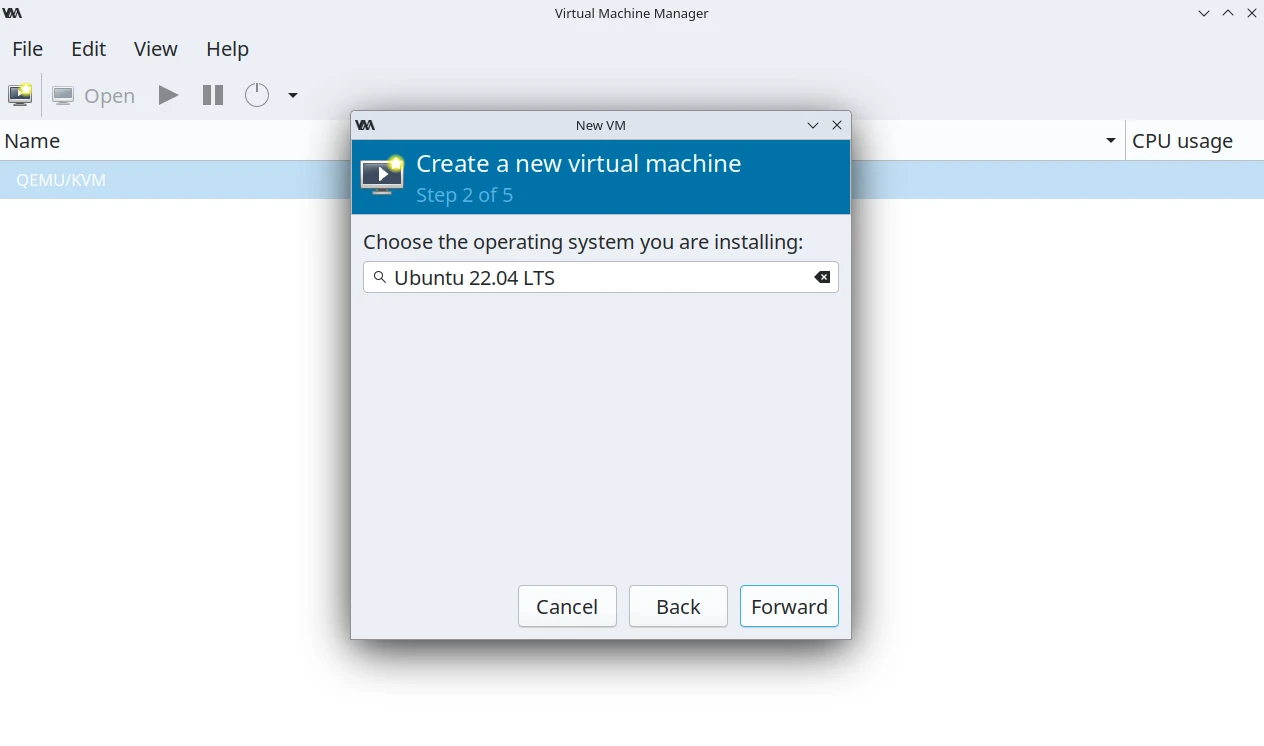
- Select the OS you are installing.
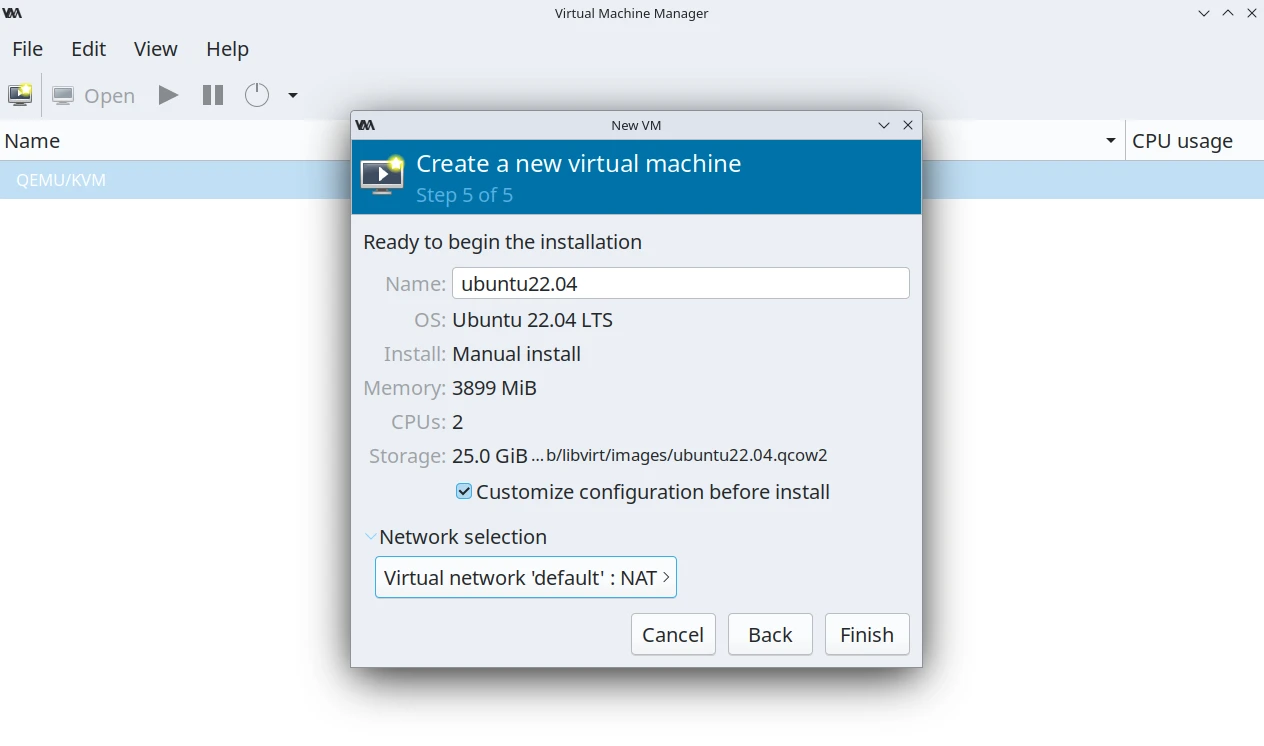
- Choose customize install before install.
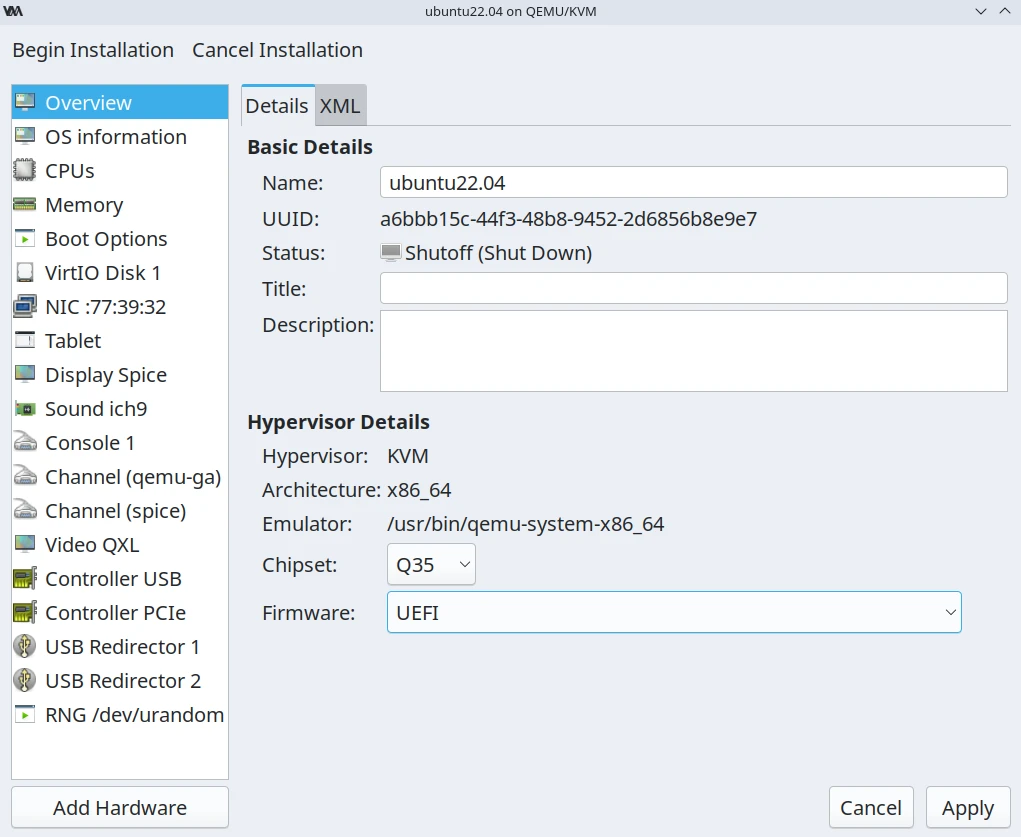
- In the VM settings overview, change Firmware to
UEFIif the flash drive supports it.
- Click
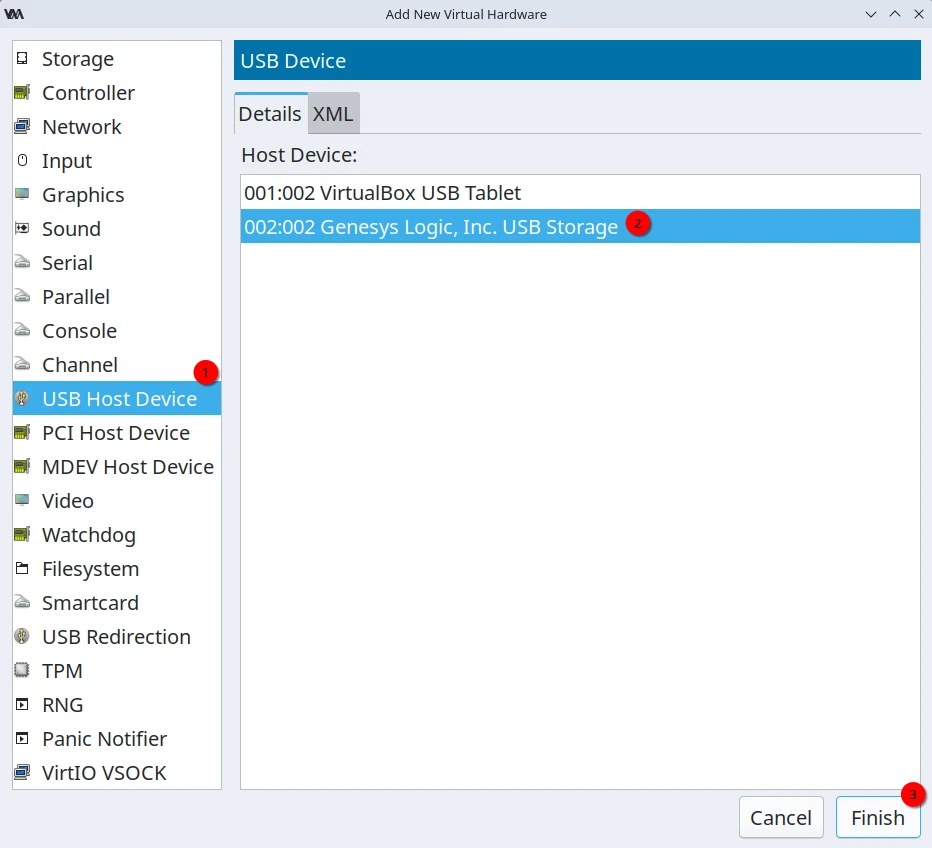
Add HardwarethenUSB Host Devicefrom the settings menu. - Choose your USB flash drive from the list of connected devices.
- Save by clicking
Finish.
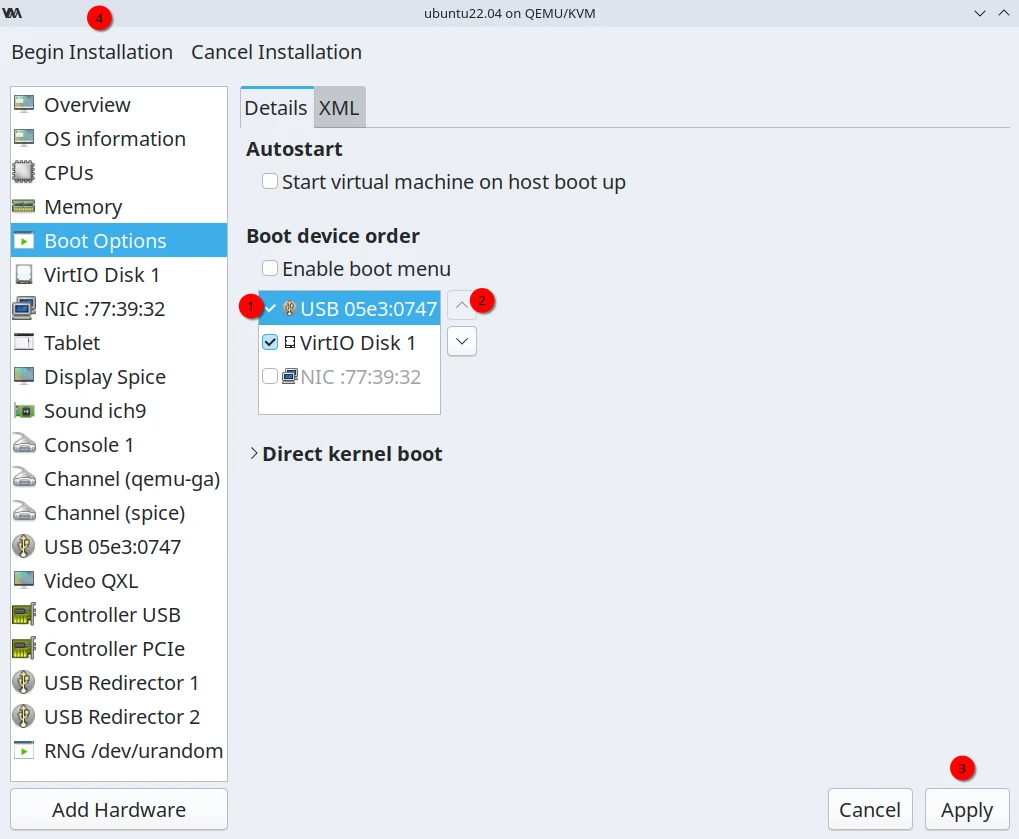
- Click
Boot Optionsto modify boot order. - Enable the check mark next to your flash drive.
- Move the flash drive to the top of the boot order.
- Save by clicking
Apply. - Start the VM by clicking
Begin Installation.
- The USB flash drive should now be booted in your VM.
