
AWS is currently offering a free EC2 instance of type T4g to their customers to promote the new AWS Graviton2 processors. AWS T4g instances are suitable for burstable workloads, which fits many workloads and web applications.
The specific instance size in the trial version is t4g.small which packs 2 CPUs and 2GB of RAM. The regular price of this instance size is $12/month. This is more generous than AWS smaller t2.micro instances that are free for the first year when you sign up for AWS.
Free Trial: Try Amazon EC2 t4g.small instances powered by AWS Graviton2 processors free for up to 750 hours / month until Dec 31st 2024. Refer to the FAQ for additional details.
The free trial was extended from the end of 2023 to the end of 2024. you will be very lucky if AWS decides to extend the free trial till the end of 2025 to allow more customers to experiment with the new platform.
It has been quite a great era for ARM-based processors, with Apple releasing their latest M4 chip which is also ARM-based, and Microsoft improving Windows for ARM performance and app compatibility accompanied by the release of the new surface laptops powered by Snapdragon Elite ARM chips. It’s also not looking very good for Intel and AMD with their AMD64 (x64) chips.
In this post, I will show you a step-by-step guide on how to create your own T4g.small instance and use it for free until the end of 2024, for now. If you don’t have an AWS account yet, sign up for an account and link your credit card. AWS has been nice to me in the past by providing startup credits that I failed to utilize to the fullest. It was really good while it lasted.
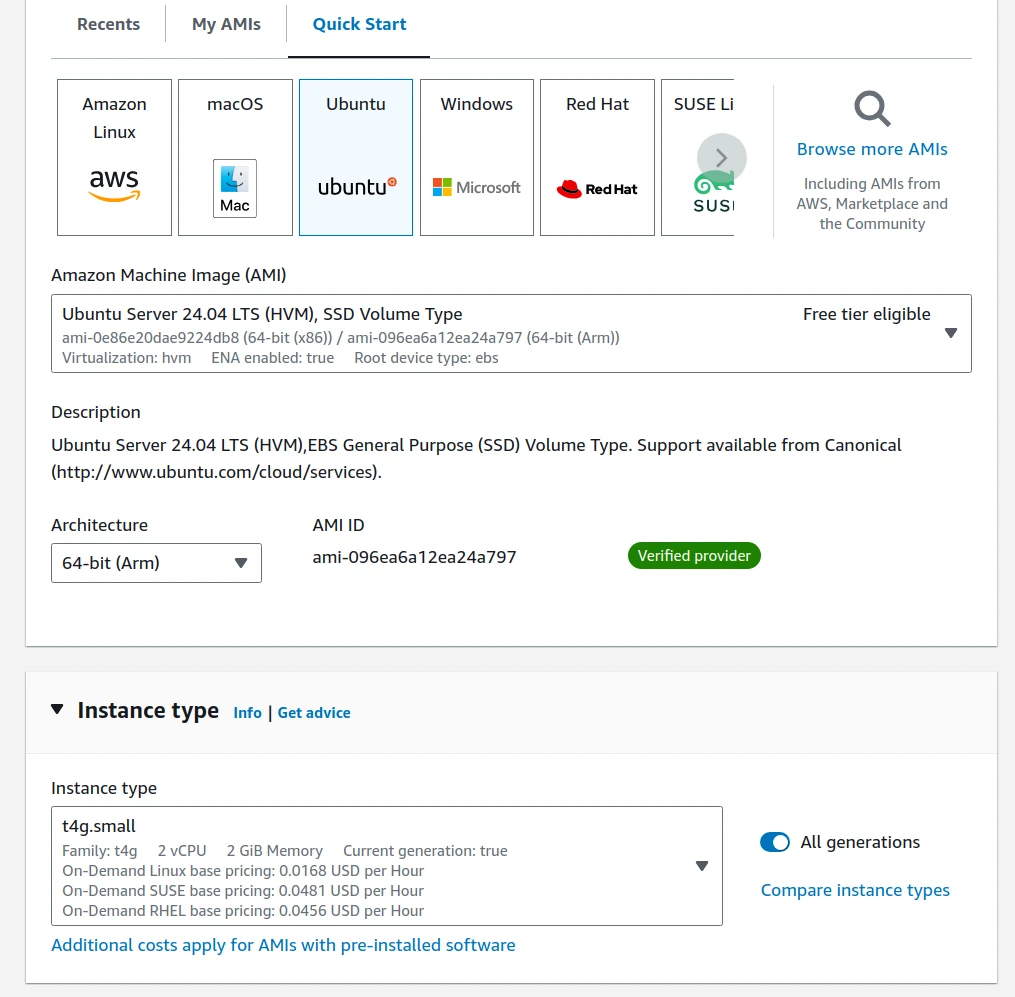
Instance image and Type
- Login to your AWS account, then navigate to EC2 service to build a virtual machine.
- The EC2 Quick Start lists common images (AMIs) to use as the base operating system of the VM.
- I will choose Ubuntu Server, and change the architecture to
64-bit (ARM), otherwise T4g will be greyed out since it’s not compatible with x64 EC2 instance. - I will change instance type to
t4g.small.
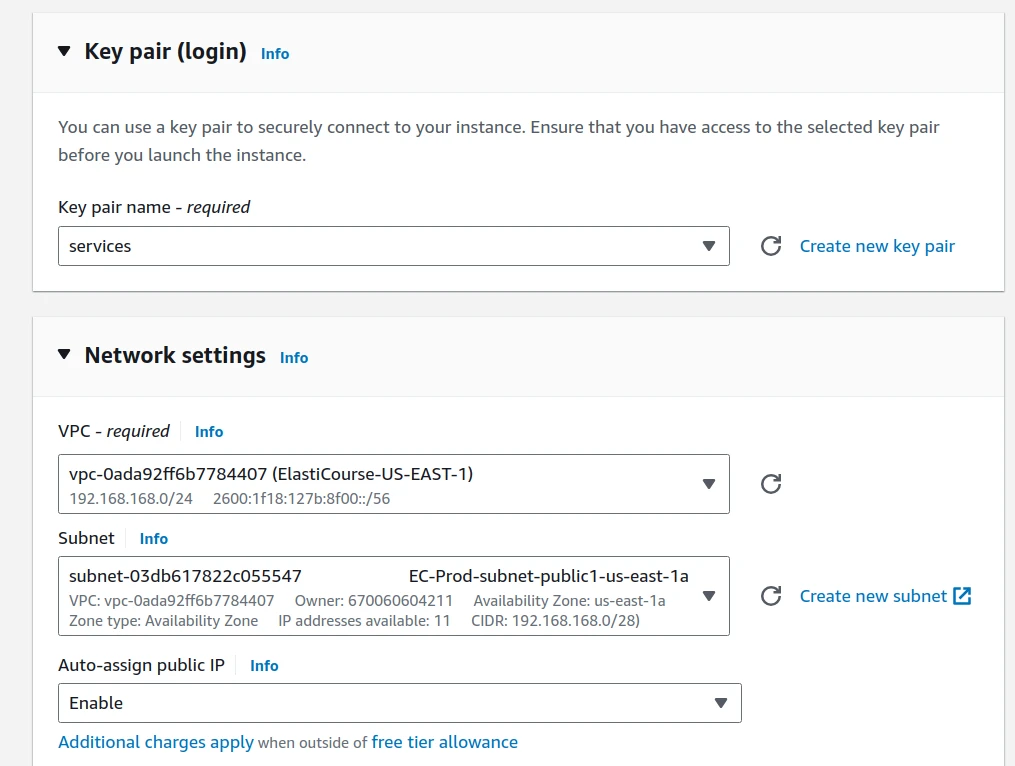
Key pair and Network
- Create a key pair
.pemto login to your instance remotely via SSH. - Security practice: Always create a new key pair for every instance.
- I will change network settings to point to the correct VPC and subnet, you can also use the default VPC.
- I will enable Auto-assign Public IP, so I can access my instance from the internet, and host public services on it.
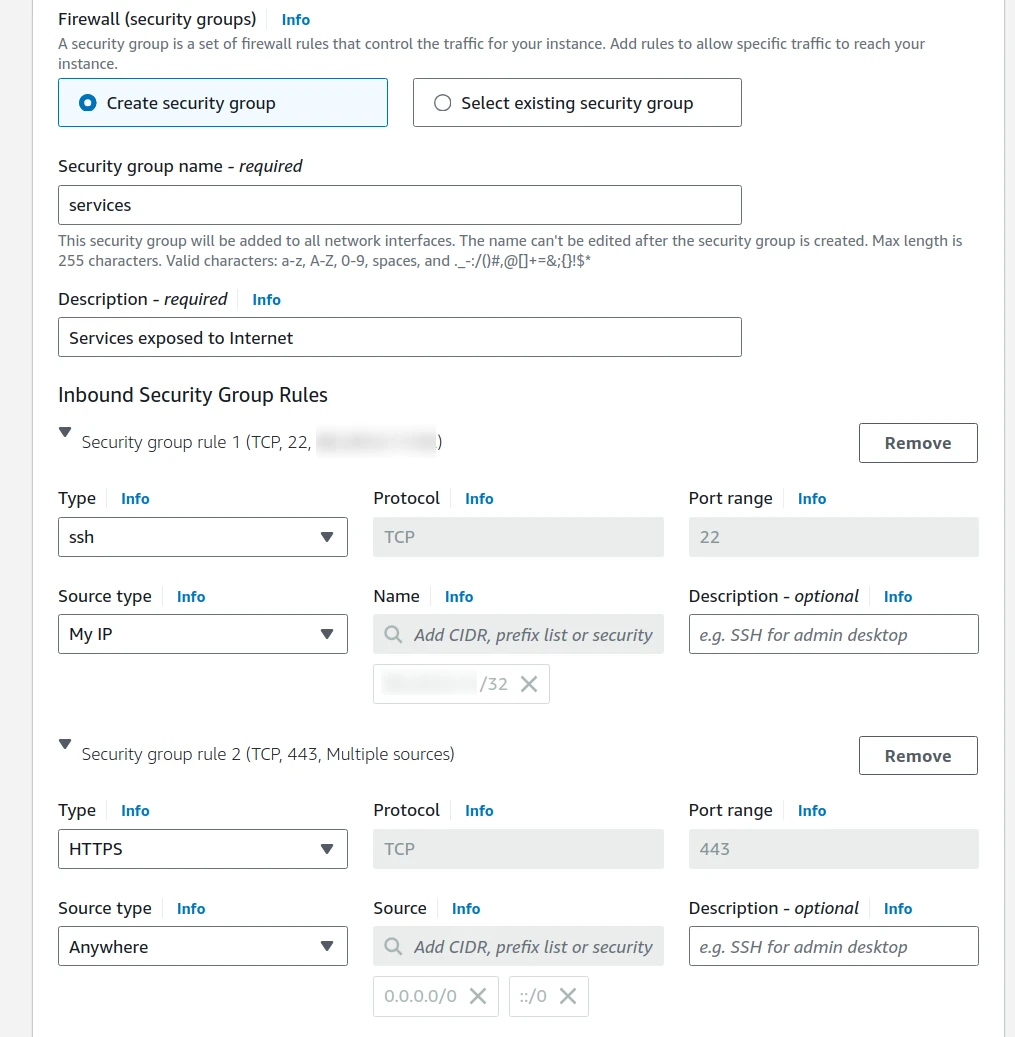
Security Group
- Security group is the firewall protecting your EC2 instance. Open the least amount of ports needed.
- For SSH, I will choose
My IPas the source, which auto-populates my public IP. - For public services I will be hosting on the server like
HTTPS, I will leave it open for all sources.
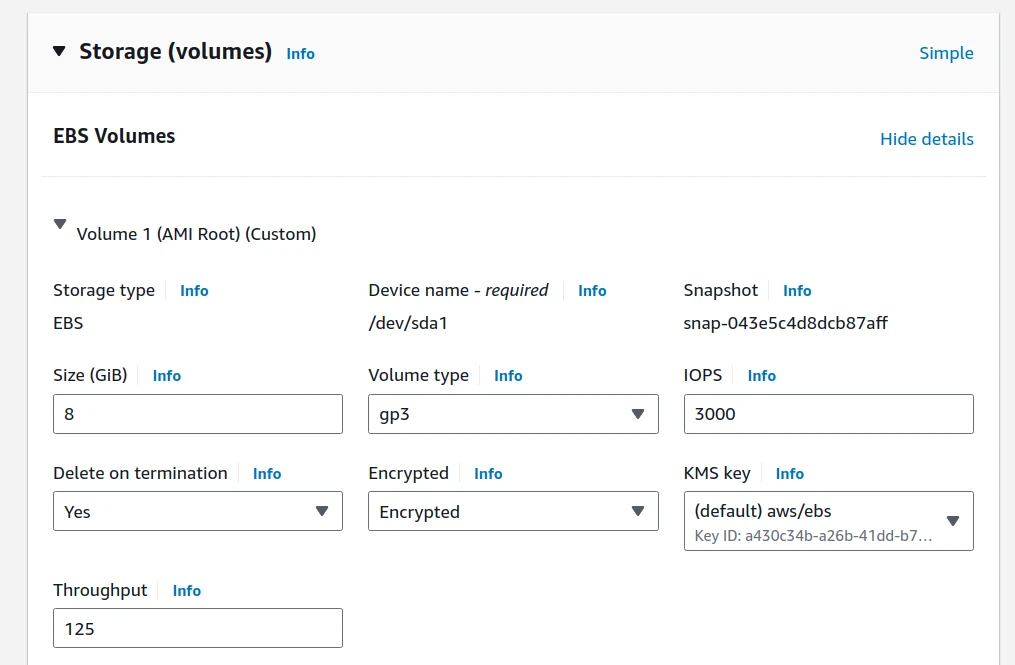
Storage Volumes
- The default storage settings is 8GB with no encryption.
- I recommend increasing the size to 10GB to avoid disk getting full quickly, and increase size later if needed.
- I will enable encryption using default key.
- Increasing the throughput from
125to300or500will improve performance of the instance, but will incur extra charges ($0.04 per MB/s per month).
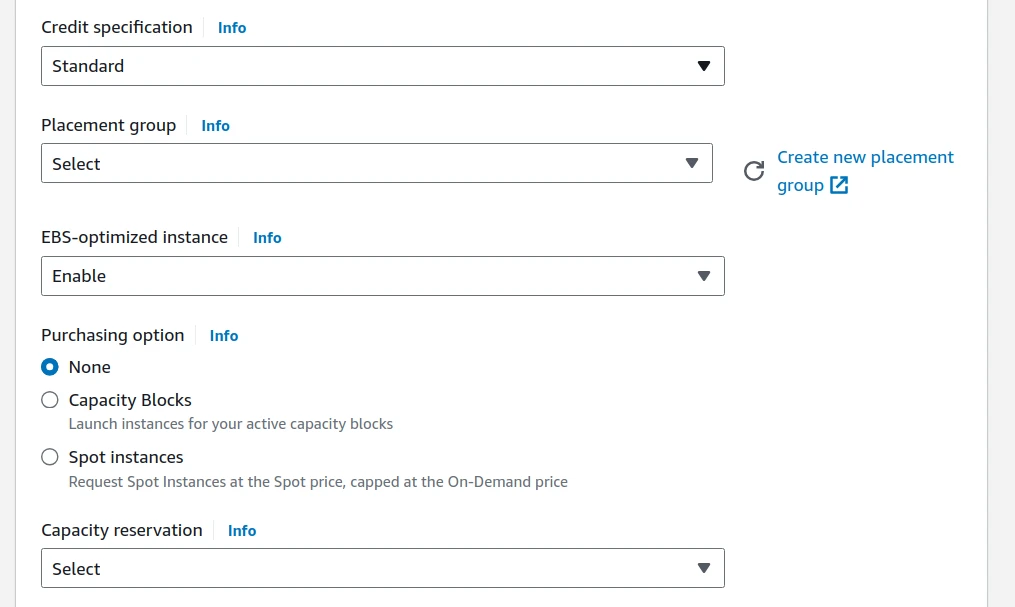
CPU Overload
- To avoid getting charged if CPU overloads beyond the baseline for extended periods, change Credit specification to Standard.
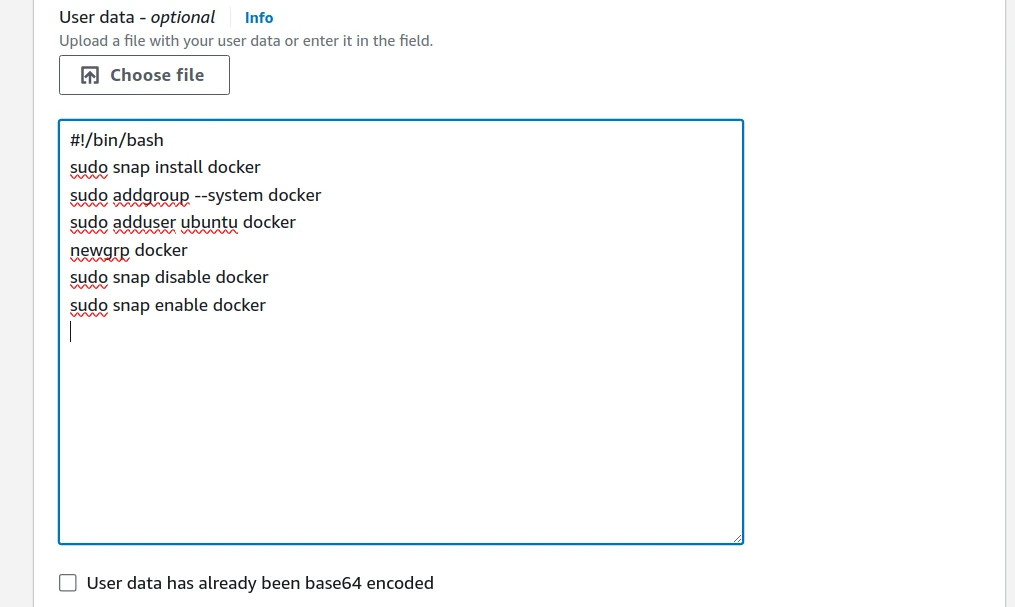
Bootstrapping User Data
- Bootstrapping is awesome. It allows you to install packages as the instance builds up.
- Since I’m using Ubuntu, I will utilize snap convenience to install docker and add my username to the docker group.
| |
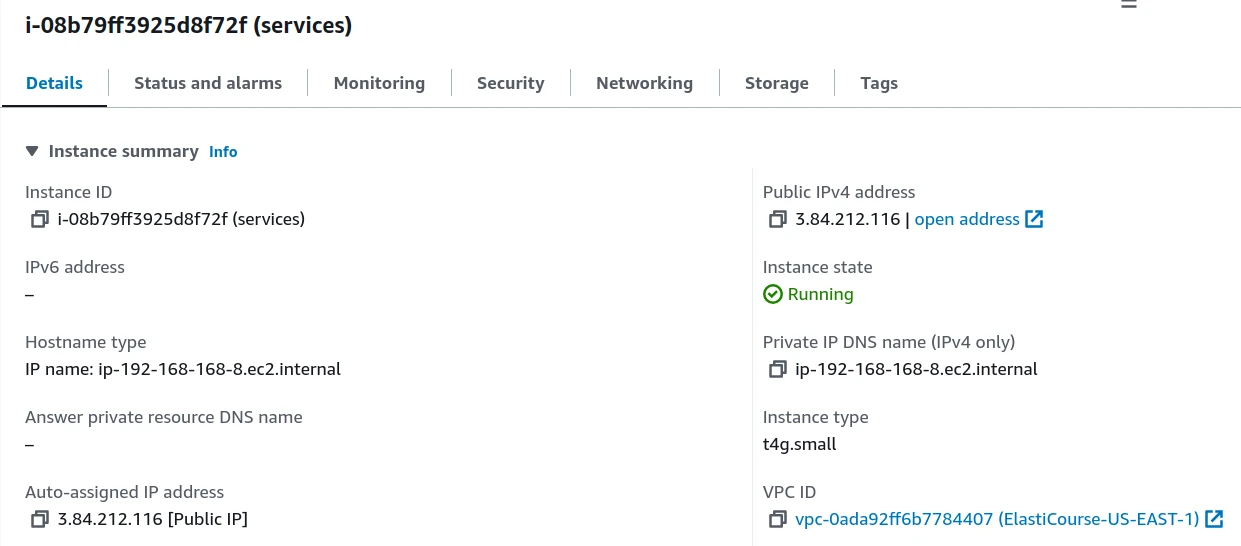
Verify Instance Details
- Once you complete the configuration steps above, click Launch instance. Click on the new instance ID being created.
- Wait for a few minutes for the instance to initialize until status check shows
2/2 checks passed. - Inspect the new instance details, and take note of the public IP of the instance.
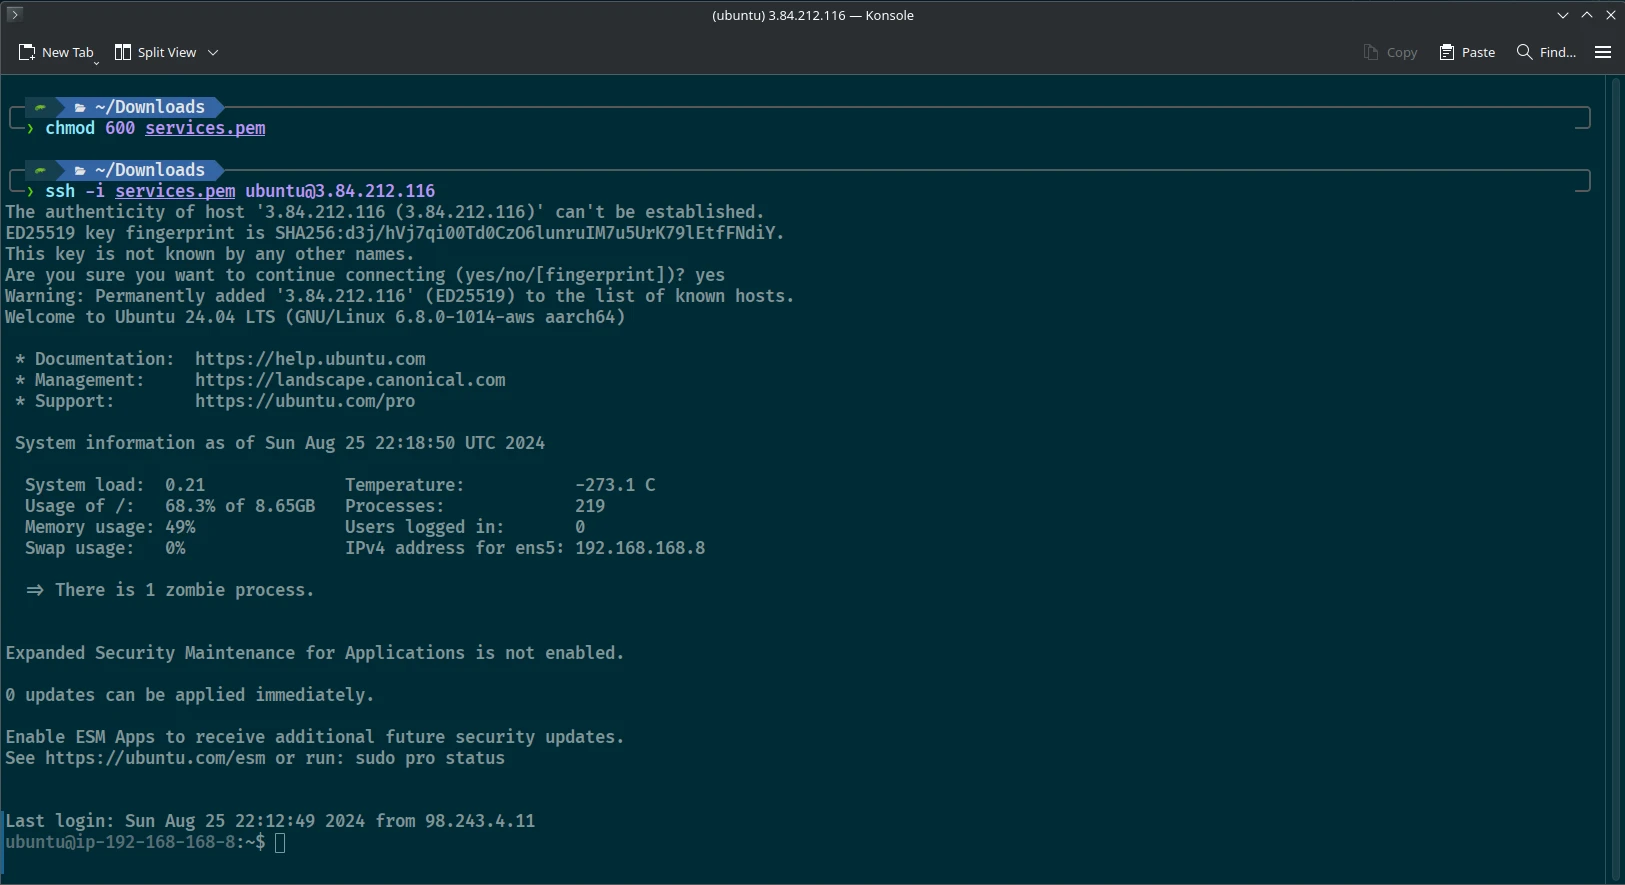
Verify SSH Connectivity
- I will use my Linux terminal app to SSH to my new instance.
- I will fix key pair
.pempermissions first using the commandchmod 600 services.pemon Linux. Windows users instructions. - To SSH with the key pair, I will need to provide the key pair name and path, the login username
ubuntuand the public IP of the instance. - From the same directory where key pair
.pemis located, I will use the command ssh -i services.pem ubuntu@3.84.212.116- I will write
yesto trust the new host.
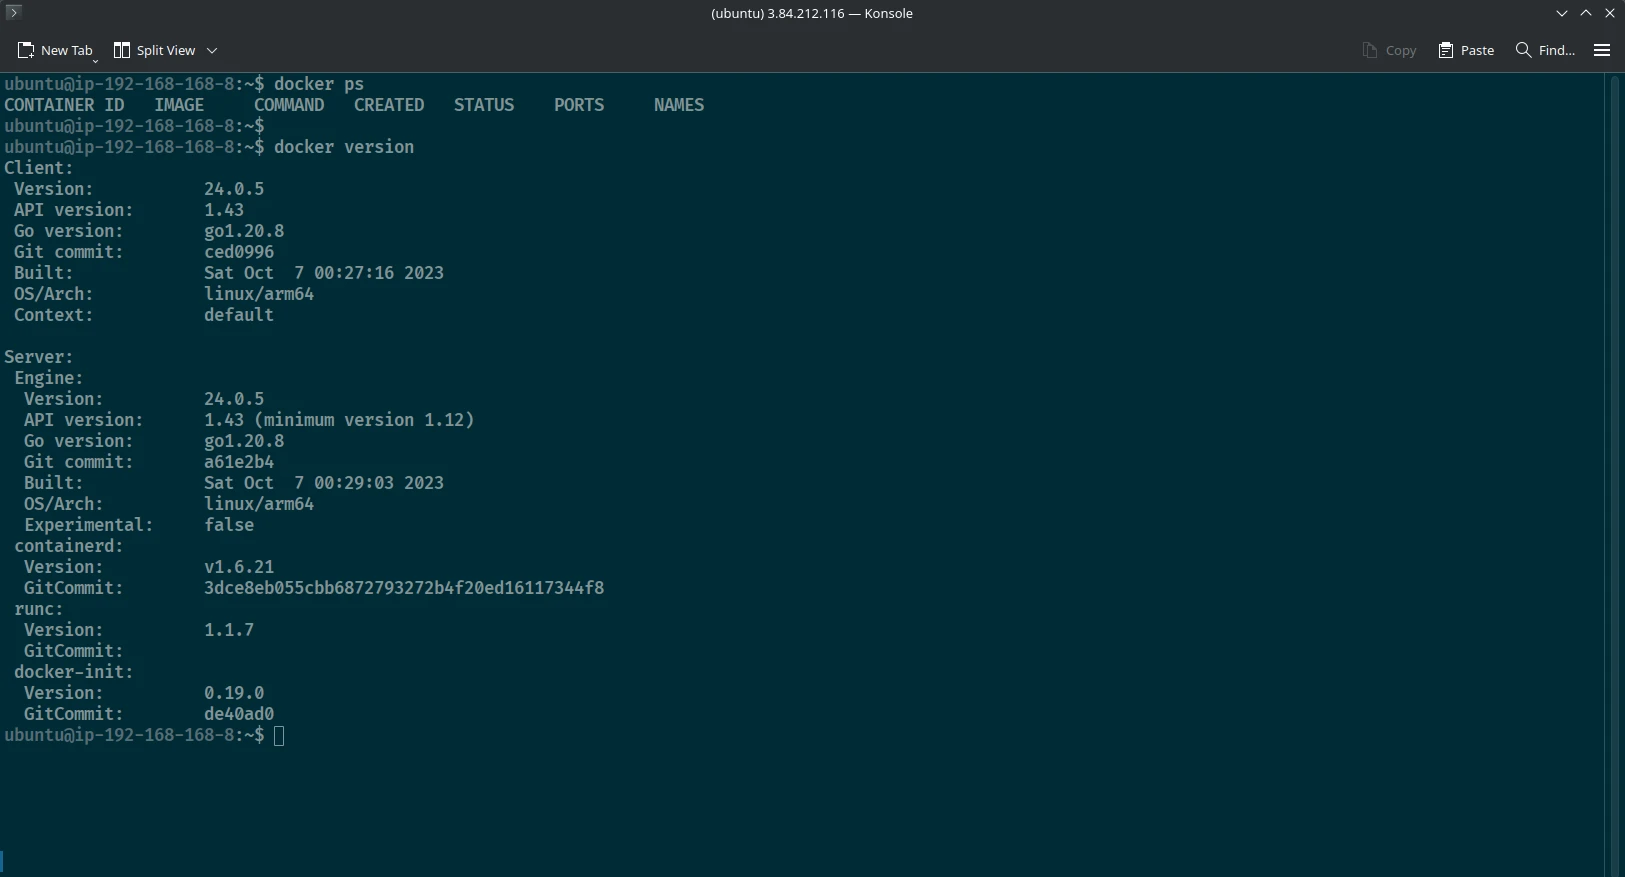
Verify Bootstrapping
- To verify if Docker was installed correctly as part of the user data, I will run
docker psto check running containers.
- If you have questions, feel free to ask them below.